Table of Contents
ToggleNetSuite Dashboard Setup: A Guide to Setting Up Dashboard Portlet
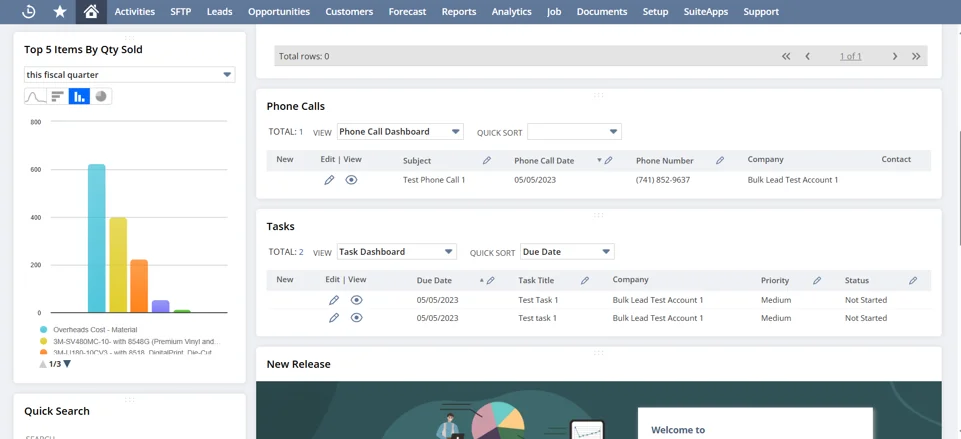
Setting up Dashboard Portlets according to your work and need makes working over NetSuite more efficient and easier Portlets usually offer a menu with a Setup option. When you click Set Up, a popup window appears where you may define the data and layout. The menu is positioned at the right side of the title bar. You can check the data and layout of each portlet as they are added to your dashboard. Portlets initially display default data or no data since you must conduct portlet setup actions after adding them to a dashboard.
Some portlets, like the KPI Meter, feature dropdown lists where you can select portlet content. If a portlet doesn’t have a dropdown list or a menu with a Set Up link, its data and layouts are not customizable.
How to set up different portlets
The configuration settings for most portlets are self-explanatory. The following list contains brief instructions for setting up various portlets.
- Analytics – Click Set Up to select a workbook visualization (chart, pivot table, or table view) from the list of available options. After choosing a visualization, you can customize the layout options, such as portlet size and title.
- Calendar – Calendar portlets provide a date-and-time-sorted summary of your activities together with links to see individual activity records. You can add the calendar portlet to dashboards on other tabs, but it is shown by default on the Activities tab. Every dashboard allows you to add numerous calendar portlets. Since they function independently of one another, they offer the flexibility to display various time frames and calendar arrangements on a single page. All you need to do is choose which calendar to display. By default, your calendar is displayed.
- Custom Portlet – Click Set Up to pick the source file from which the SuiteScript results will be displayed.
- Dashboard Tiles – Click Set Up and then choose Dashboard Tiles from the Source list. For further information, see Dashboard Tiles.
- Navigation Portlet – In the Source section, click Set Up and select Navigation Portlet. For more information, visit the Navigation Portlet.
- Custom Search – Click Set Up to choose the saved search and the number of results to show. You can also give your portlet a unique title and select whether to drill down into search results within the portlet or on a separate page. If the Inline Editing functionality is enabled, you can decide whether to allow inline editing of search results.

- KPI Meter – Select a KPI from the dropdown list to display. Set Up allows you to choose date ranges, comparisons, and highlighting options.
- Key performance indicators – Click Set Up to choose standard or custom KPIs based on stored searches. After selecting the KPIs, you can choose the comparison and highlighting options.
- KPI Scorecard – Select Set Up to choose a KPI scorecard and specify the layout of it.
- List: To choose the record type and the quantity of records to display, click Set Up. Turn on Inline Editing to edit records directly in the portlet. View How to Use Inline Editing.
- My Login Audit– To customize display settings to monitor your personal login behaviour, click Set up.
- Phone Calls: To specify how many records to display, click Set Up.
- Project Tasks: To add a List portlet to your dashboard, select Project Task as List Type from the portlet menu by clicking Set Up.
- Quick Add: To choose the kind of record to be added, click Set Up.
- Quick Search: Enter terms in the portlet’s text box, choose a field name from the Search For dropdown list, then click Set Up to choose the kind of records to search.
- RSS/Atom Feed: To choose a feed and adjust display settings, click Set Up. You can select custom and specify a URL for an alternate feed, or NetSuite offers a number of standard feeds.
- Reminders: Select the types of reminders and how many days ahead of time they should appear by clicking Set Up.
- Report Snapshot: To display data on a graph, choose a date range. Click Set Up to choose a display type and further layout options, if available.
- Search Form: You can show this search form in a portlet on your dashboard if one of your saved searches is the recommended search form for a specific record type.
- SMT Links: To examine or update, select a domain and website.
- Shortcuts: To rearrange the current collection of shortcut links, click Set Up. To add a shortcut, click New Shortcut if you are aware of the page’s URL. Go to the page and choose Add to Shortcuts from the More option if you don’t know the URL.
- Tasks: To see the tasks that other users in your system have been assigned, select the Basic view.
- Trend Graph: Click Set Up to choose the layout settings and up to three KPIs to graph. Click on the time period options in the portlet to adjust the X-axis scale of the graph.


