Table of Contents
ToggleSimplified Requisition Entry: Your Path to NetSuite Proficiency
Efficiently manage procurement processes in NetSuite by mastering requisition entry. Learn how to utilize the requisition form to request item purchases, track estimated totals, and manage approvals effectively. SuitePedia offers comprehensive insights into NetSuite’s requisition workflow, empowering users to streamline purchase requests, track purchase orders, and ensure seamless procurement operations
How to Submit a Requisition?
Complete a Requisition form to request the purchase of items. As you input items and their respective costs into the Requisition, the form displays the estimated total. For approval purposes, an anticipated percentage or amount for each line must be specified. Once a purchase request is generated, the Requisition reveals the total, associated purchase order number, and the status of the linked purchase order.
A Requisition can be submitted through either an Employee Community role or a Manager role.
Entering Requisitions with the Administrator Role
For users that have an Administrator role, you can also enter a requisition as described below.
To enter a requisition as an administrator:
Requisitions can be entered using either an Employee Center role or an Administrator role.
Note
When you create a purchase order from the requisition you may not receive the approval status you expect. The approval status depends on several states. For example, your Approval Routing feature is enabled, but the Purchase Orders box is not set on the Approval Routing accounting preference. A purchase order created from a requisition is not automatically approved if the user’s subsidiary is the parent and not in the role’s subsidiaries’ list.
Take note of the following scenarios:
- When a Purchase Order Workflow is suspended, the Employee field value is blank on the Purchase Order, and the result is Result is Pending Receipt.
- When the Purchase Order Workflow is enabled, and you select the parent subsidiary, the result is Approved by Supervisor/Pending Receipt.
- When the subsidiary selected is not the parent, the Purchase Order Workflow is released. When the Supervisor of the employee is blank, the result is Approved by Supervisor/Pending Receipt.
- When the subsidiary selected is not the parent and you create a new employee who is assigned to the parent subsidiary. The supervisor field of the employee is filled. The Purchase Order Workflow is released but the employee is not the user who created the purchase order. The result is Pending Supervisor Approval.
- When the subsidiary selected is not the parent and you create a new employee who is who is not assigned to the parent subsidiary. The supervisor field of the employee is filled. The Purchase Order Workflow is released and the employee is the user who created the purchase order. The result is Approved by Supervisor/Pending Receipt.
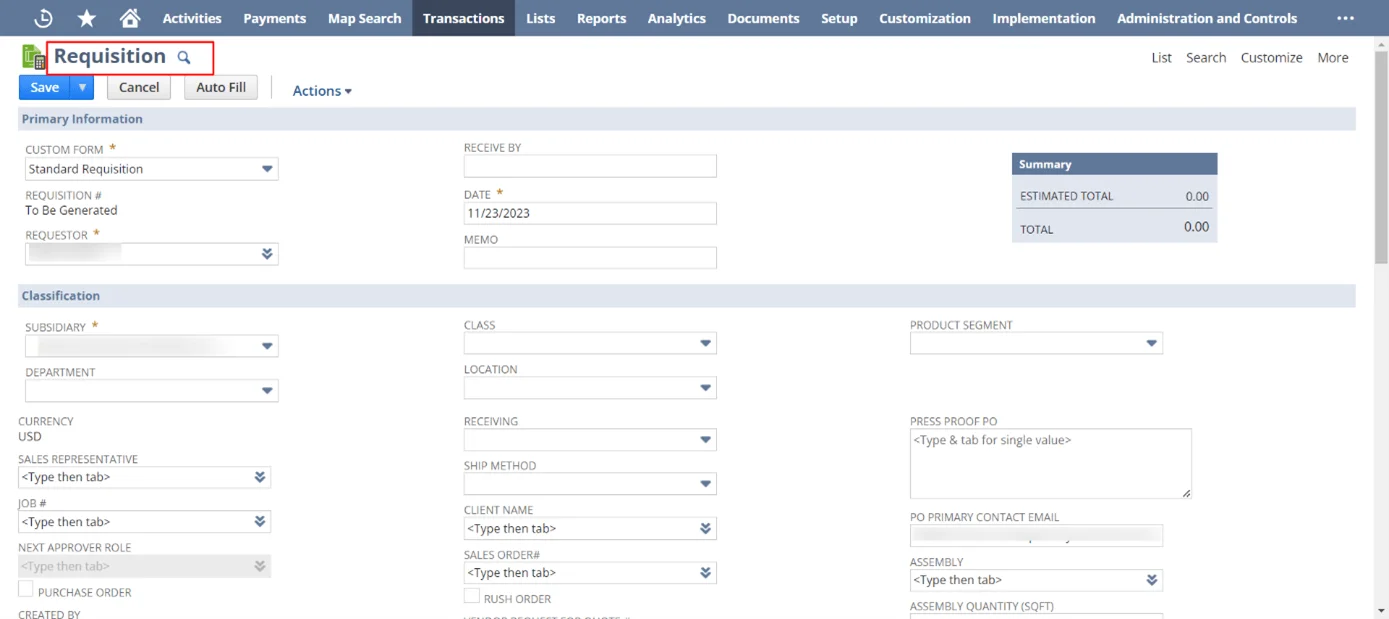
Primary Information
1. In the Custom Form field, choose the Standard Requisition form or select a custom form you have already created. Click New to customize a requisition form.
2. In the Requisition field, NetSuite increases the largest requisition number by one. You can enter another number. The next requisition number reverts to the standard pattern.
Note
The maximum number of characters you can enter in this field is 45.
3. In the Requestor field, select the employee or user making the request. This can also be a company representative, such as a consultant.
4. In the Receive By field, enter the date by which you need to receive the requested items.
5. Enter a date for this requisition. The current date shows by default.
6. In the Memo field, enter a memo to identify this purchase order.
Classification
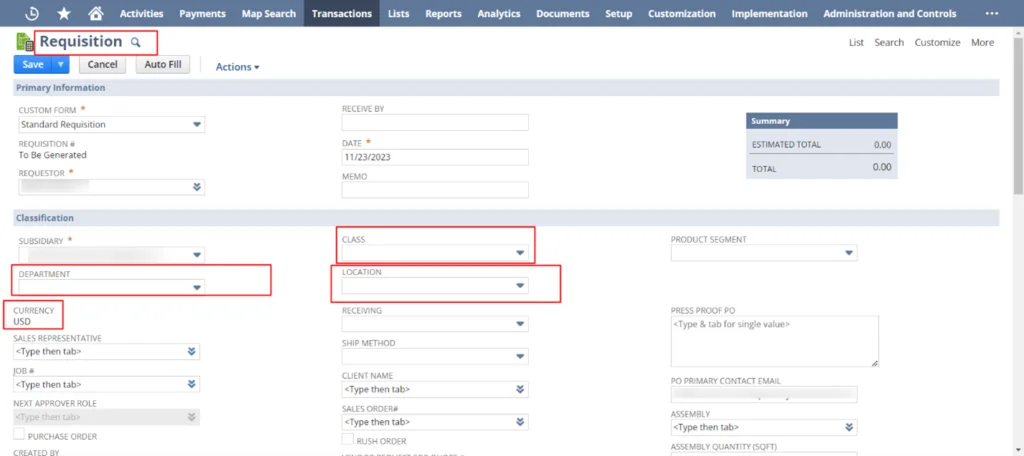
1. Select a department or class if you track them. For OneWorld accounts, you can select a department or class from the requestor’s subsidiary.
2. If you track locations, choose a location for this order. For OneWorld accounts, you can select a location from the requestor’s subsidiary.
3. The requestor’s currency appears in the Currency field. All currency amounts on this transaction are shown in this currency.
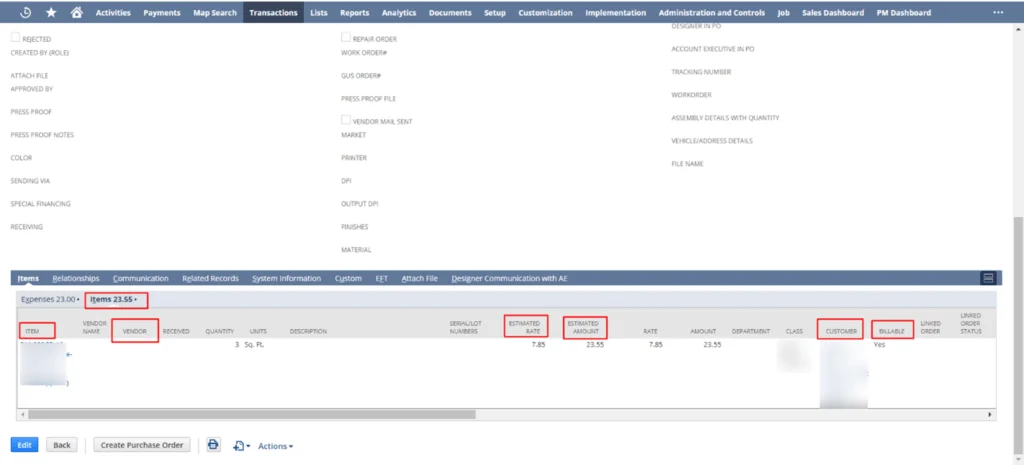
Items
1. Click the Items subtab.
Note
For inventory items, quantity, rate, and amount must be greater than zero (0). Negative values are permitted for non-inventory items.
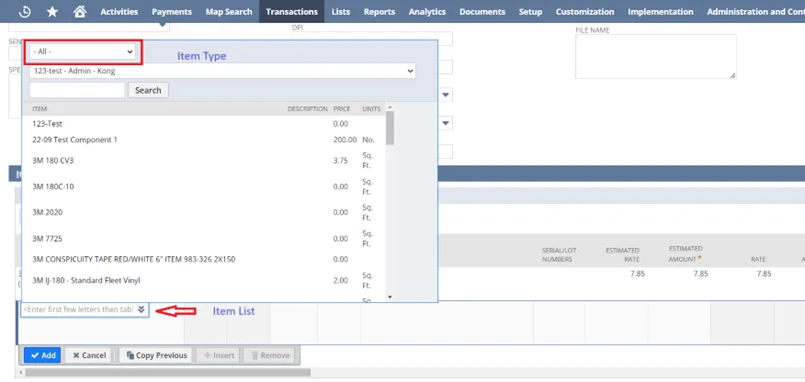
2. In the Item column, select an item.
a. To add multiple items to the transaction.
b. Click Add Multiple
- The Choose Item window opens and shows a list of items you can add.
c. Filter the list by item type or name.
d. In the left pane, click an item to add it to the right pane
e. Enter a Quantity for the item.
f. Click Done.
Items and quantities shown in the right pane are added to the transaction.
3. Optionally select a vendor for the item.
You can leave this field blank initially, but a vendor must be selected before the requisition can be further processed for purchasing.
4. In the Quantity column, enter the quantity for this item.
5. In the Serial Number field, enter the serial number of the item.
Separate each serial number with a space, comma, or by pressing Enter after each one.
Note
You must enter a serial number for each serialized item. For example, if you enter a quantity of 2, you must enter two serial numbers.
6. Enter an Estimated Rate for the item. This rate can be changed before a purchase order is created if you are not certain of the rate to be charged for the item. An estimated rate or amount must be entered on each line for approval purposes.
When you enter an estimated rate, the estimated amount for the line autofills in the Estimated Amount column.
7. If there is a purchase price assigned to the item, it is displayed in the Rate column as a reference for the buyer.
8. Set any options for this item.
9. Select a department or class if you track them.
10. If this item is for a particular customer, select that customer in the Customer column
11. If you want the cost of this item billed back to the chosen customer, check the Billable box.
12. Click Add.
13. Repeat these steps for each item you want to add.
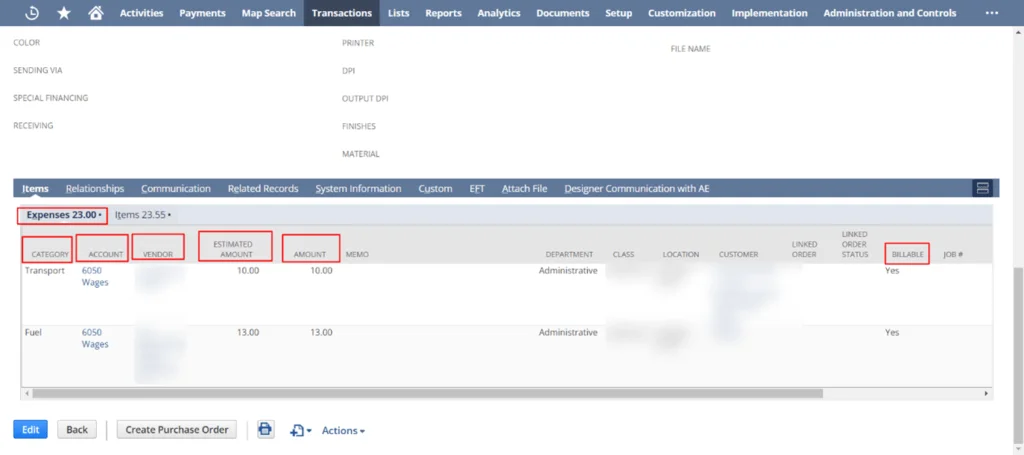
1. If you allow expenses on requisitions, click the Expenses subtab.
2. Select a category for the expense.
3. In the Account column, select an account for this expense.
4. Optionally select a vendor for the expense. You can leave this field blank initially, but a vendor must be selected before the requisition can be further processed for purchasing.
5. Enter an Estimated Amount for the expense. This amount can be changed before a purchase order is created if you are not certain of the amount to be charged for the expense. An estimated amount must be entered on each line for approval purposes.
6. The Amount column will be filled in after the purchase order is placed and will represent the purchase order amount.
7. Optionally enter a memo for this expense line.
8. Select a department, class, or location if you track them.
9. If this expense is for a particular customer, select that customer in the Customer column.
10. If you want this expense billed back to the chosen customer, check the Billable box.
11. Click Add.
12. Repeat these steps for each expense you want to add.
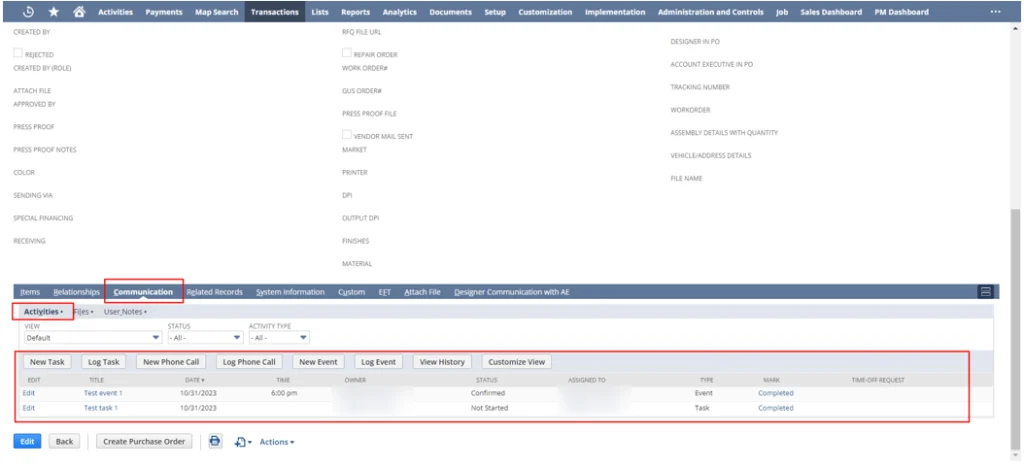
Communication
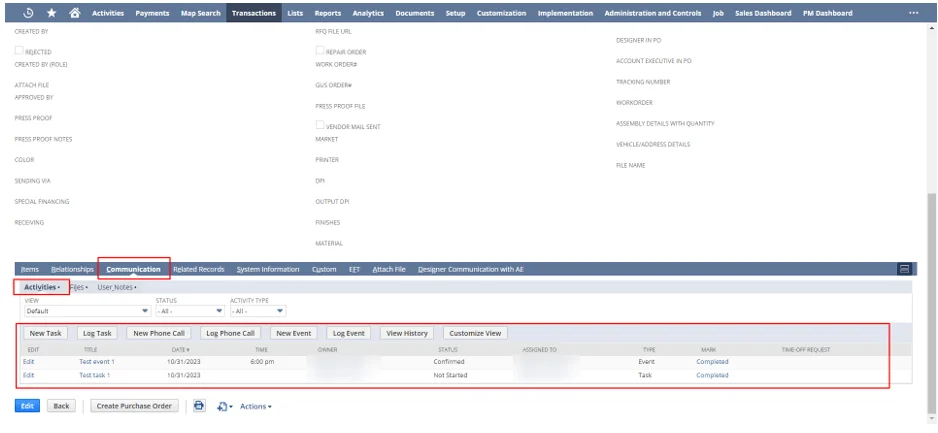
1. Use the Events, Tasks, and Phone Calls subtabs to attach activities to this transaction.
2. On the Files subtab, you can select and attach files from the File Cabinet related to this transaction. For example, you can attach files and notes related to this requisition to specify quality or technical requirements
- Select New to upload a new file to File Cabinet.
3. On the User Notes subtab, you can enter a title and note for any comments you want to add to this transaction. Click Add after each note.
4. When all information about the form is complete, click Save.
How to enter Requisitions in the Employee Center?
When logged in to your Employee Center role, requisitions can be entered through the Employee Center.
To enter a requisition using the Employee Center:
1. Log in to the Employee Center.
2. Click Enter Requisition
3. Complete the form as necessary. See the preceding steps for details.
Note
If your company uses approval routing, the requisition must go through the approval process before a linked purchase order can be created.
