Table of Contents
ToggleUnderstanding Request for Quote (RFQ) and Contract Awards in NetSuite: A Guide
Explore the Request for quote (RFQ) and contract awards with SuitePedia’s specialized advice for NetSuite users. Delve into the details of financial transparency, enabling more informed choices and enhanced business management.
Evaluating and Granting a Request for Quote
Following the bid deadline, the Request for Quote (RFQ) document will show an “Awards” section. Utilize this section to review vendor replies and decide on awarding purchase agreements to specific vendors.
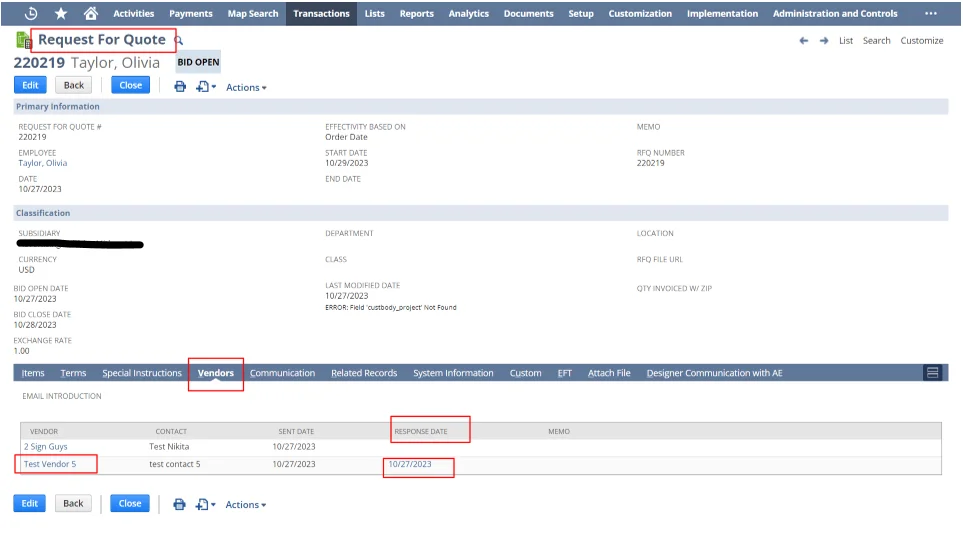
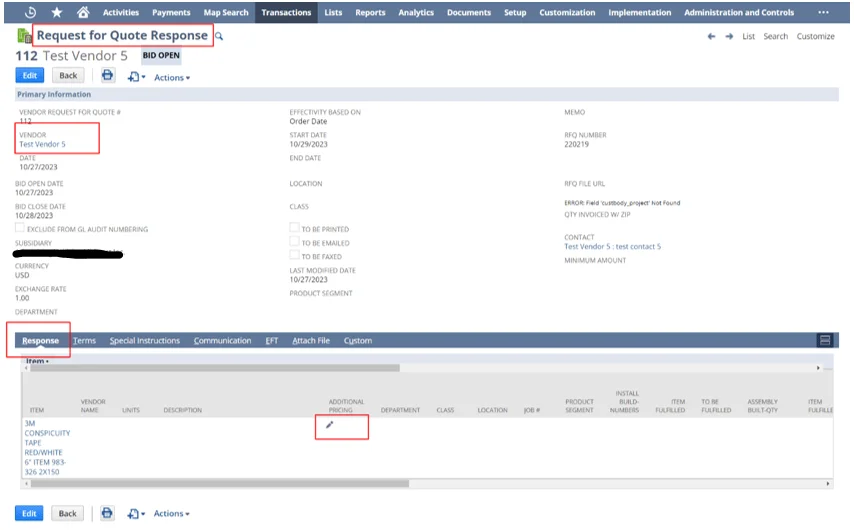
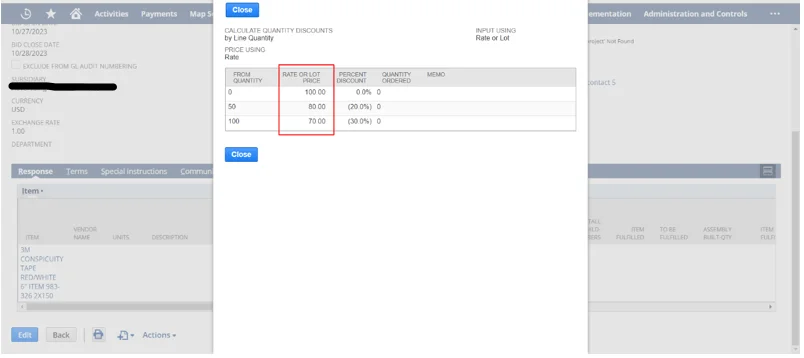
To analyze quotes and award contracts:
1. Go to Transactions > Purchases > Enter Requests For Quote > List.
2. Click View next to an RFQ
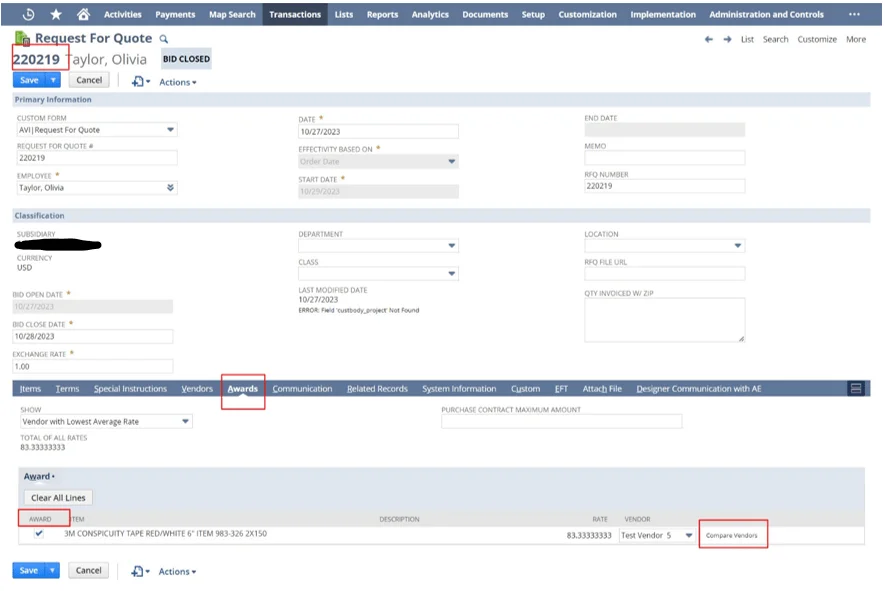
3. Click the Awards subtab.
4. In the Purchase Contract Maximum Amount field, set the maximum contract amount for this transaction.
Note
If you use Approval Routing, note the following about the Purchase Contract Maximum Amount field. It determines the value of the Maximum Amount field on the purchase contract that generates after awarding a request for quote to a vendor. The Maximum Amount field determines the required approval level of a purchase contract. For more information.
5. In the Show field, choose a setting to display the vendor quote information.
- Vendor with Lowest Average Rate – for each line item, display the vendor that quoted the lowest average rate for all tiers.
- This is the default setting
- Vendor with Lowest Average Rate
- Vendor with Lowest Tier 1 Rate
- Vendor with Lowest Tier 2 Rate
- Vendor with Lowest Tier 3 Rate
- RFQ Vendor Average Rate (if there are multiple vendors, there is a selection for each vendor)
6. The Total of All Rates field shows the sum of all responses not yet awarded based on the selection in the Show
7. Check the Award box by a vendor to award the item to a purchase contract for that vendor. When you click Save, purchase contracts are created for the item/vendor combinations on awarded lines.
8. Select a Vendor to specify an alternative vendor to purchase the item from.
9. Click the Compare icon to view a comparison of response details from all vendors. This function lets a buyer compare data across all vendors to determine the quote that works best. For example, Vendor 1 might quote the lowest rate, but Vendor 3 could offer better terms. This might be the deciding factor in selecting a vendor.
The popup window displays the following data for all vendors the RFQ was sent to:
- Average rate
- Rate for each tier
- Minimum Purchase Amount – The minimum purchase amount the vendor expects the buyer to purchase. The vendor may charge a penalty if this amount is not met.
- Total Purchase Discount – Identifies whether a vendor has provided a Total Purchase Discount. The details of the discount can be viewed in the vendor’s Request for Quote response.
- Incoterm
- Payment Terms
- To select a vendor, click the check mark icon on the line by the vendor. Then, the Compare box closes and that vendor is selected for that line item.
- Repeat these steps to compare vendors for other items on the RFQ.
10. After vendors are selected for each line item, the line items can be awarded to vendors. To award vendors on a RFQ, check the box in the Award column to award that line item.
Note
After a line has been awarded to a purchase contract, it is no longer displayed in this list.
11. Click Save
After the RFQ is saved, a purchase contract is created for all line items, one contract per vendor. The purchase contract is populated with data from the vendor response for the line item.
After an RFQ has an Award Received status, the Items subtab include purchase links to related contracts. Click the link to view the purchase contract.
On the purchase contract, click the Additional Pricing icon to verify the vendor rates.
