Table of Contents
ToggleHow To Create Purchase Orders In NetSuite?
Explore a detailed tutorial on creating purchase orders within NetSuite, highlighting the crucial steps through SuitePedia. Optimize your processes and boost productivity. Streamline your operations and enhance efficiency.
Issuance Of Purchase Orders
A purchase order is an official document to a supplier detailing the ordered goods or services. Purchase orders authorize vendors to provide items, materials, or services to our company. When a user enters purchase orders, he/she can track items that they expect to receive, items they do receive, and items yet to be received.

A procurement document signifies an obligation to acquire and compensate for products and services. Its financial implications are activated only upon the receipt of the ordered items.
When you create purchase orders, you can print, fax, or email them to vendors.
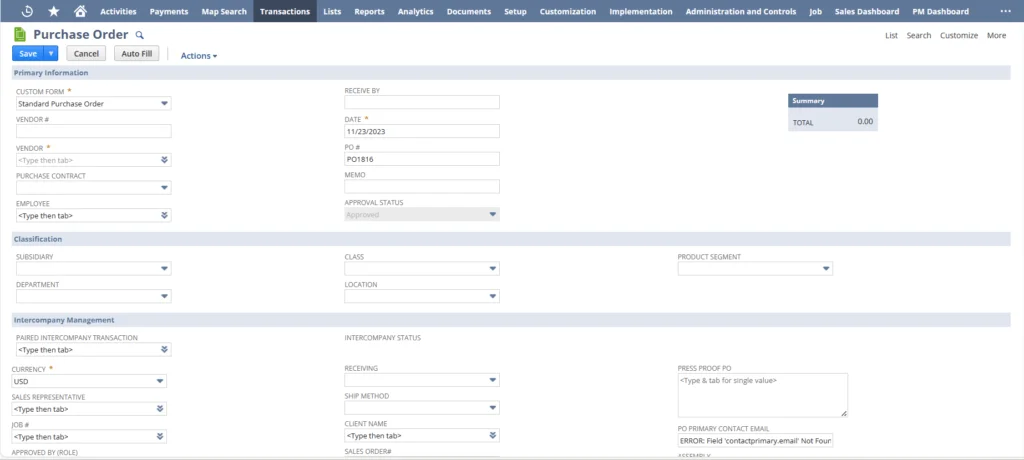
To create a Purchase Order, go to the Purchases under Vendors and select Enter Purchase Order.
Note
In the case of a Vendor Bill with PO only, if the amount of the bill is within the threshold (If any) then the Vendor Bill will be automatically approved. If the bill exceeds the threshold, then it will move according to the approval matrix for Vendor Bill.
This will generate a pending receipt.
- Information needed to generate Purchase Order:
To generate a purchase order, the User needs the below basic information:
- Vendor Name (selection needs to be done from the vendor list)
- Receive by Date
- Memo
- Receive by Date
- Subsidiary Selection
- Department
- List of Items (selection needs to be done from the Item list)
- Contact under the relationship subtab (selection needs to be done from the vendor contact list)
- Attachments under the communication subtab (if available)
Vendor name selection is mandatory to auto- fill the purchase order form.It will fetch the details of the last transaction of the same vendor.
Users can also auto-fill the PO details by clicking on the Auto Fill button.


