Table of Contents
ToggleHow to Approve/Reject Estimate in NetSuite?
Follow the below steps to approve Estimate:
1. Sales Manager needs to login to NetSuite as ‘Sales Manager’ role
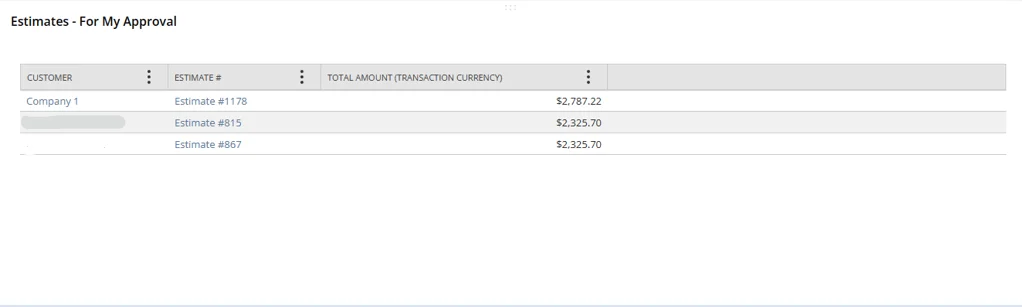
2. Through email notification/ NetSuite dashboard, manager can view the Estimates in his/her queue which are pending for approval
3. Open the required Estimate record and Approve/Reject the Estimate by clicking the respective button
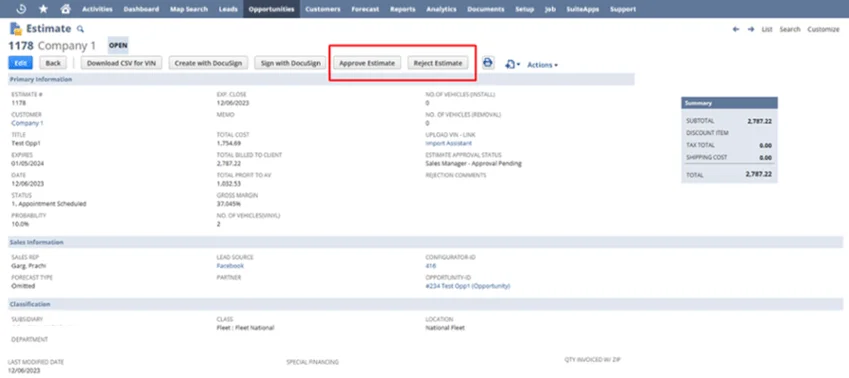
4. Once, Estimate is approved. AE will get notified and Estimate can be Sent to Client
5. To reject an Estimate, Manager can add Rejection remarks and hit Reject button. AE will get notified and he/she needs to edit the Configurator record and create a new Estimate with required editions.
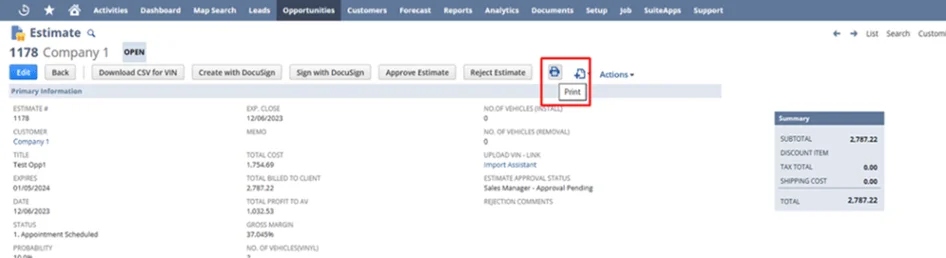
Estimate PDF
- To print the Estimate PDF, click on ‘Print’ icon
Note
Multiple Estimates can be created from a single Opportunity or from a single Configurator.
Estimate Approval Routing Workflow
NetSuite’s Estimate Approval Routing Workflow is a feature within the NetSuite Enterprise Resource Planning (ERP) system that allows organizations to set up and automate the approval process for estimates created within the system.
Here’s an overview of how the Estimate Approval Routing Workflow typically functions in NetSuite:
- Creation of Estimates: Users create estimates within NetSuite for various purposes such as sales quotes, project estimates, or service estimates.
- Approval Process Setup: Administrators or authorized users can set up approval workflows defining the specific approval hierarchy, rules, and criteria for the estimates. This setup includes defining who needs to approve the estimates, based on factors like amount thresholds, departments, or other custom criteria.
- Routing for Approval: When an estimate is created, it gets automatically routed through the configured workflow. The system identifies the designated approvers based on the predefined criteria.
- Approval Notifications: Approvers receive notifications/alerts about pending estimates requiring their approval. Notifications might be through emails or within the NetSuite system itself.
- Review and Approval: Approvers review the estimates, possibly adding comments or making necessary changes if permitted. They then approve or reject the estimate based on the provided information.
- Automated Actions: Upon approval, the system can trigger further actions such as generating purchase orders, initiating projects, or other relevant processes linked to the approved estimate.
- Tracking and Reporting: NetSuite keeps track of the entire approval history, providing visibility into who approved or rejected an estimate and when. Reports and dashboards can be generated to analyze the approval process efficiency and bottlenecks if any.
The Estimate Approval Routing Workflow in NetSuite streamlines the process of obtaining necessary approvals for estimates, ensuring compliance with internal policies and providing transparency into the approval chain.
Steps to Complete the Estimate Approval Workflow
Configuring an Estimate Approval Routing Workflow in NetSuite involves several steps. Here’s a general outline of the process:
- Accessing NetSuite:Log in to your NetSuite account with appropriate administrative privileges.
- Navigate to Customization: Go to ‘Customization’ in the top menu. Select ‘Workflows’ or ‘Approval Management’ (depending on the NetSuite version and customization settings).
- Create a New Workflow:
Click on ‘New Workflow’ or ‘New Approval Process.’ Give the workflow a name that identifies its purpose, like “Estimate Approval Workflow.”
- Define Workflow Properties: Configure basic settings such as the workflow name, type (Estimate Approval), and description.
- Set Up States and Transitions: Define states like ‘Pending Approval,’ ‘Approved,’ and ‘Rejected.’ Create transitions between these states, specifying conditions triggering the transitions (e.g., amount thresholds, specific users, departments) Determine the sequence of approval (serial or parallel) if multiple approvers are involved.
- Add Actions and Notifications:
Define states like ‘Pending Approval,’ ‘Approved,’ and ‘Rejected.’ Create transitions between these states, specifying conditions triggering the transitions (e.g., amount thresholds, specific users, departments). Determine the sequence of approval (serial or parallel) if multiple approvers are involved.
- Assign Approvers:
Define actions to be performed upon transitions (e.g., send notifications, trigger related processes). Configure email notifications or in-system alerts for users involved in the approval process.
Test the Workflow: Before deployment, test the workflow with sample estimates to ensure it functions as intended. Verify that notifications are sent correctly and approvals follow the defined routing.
Deploy and Monitor: Once satisfied with the setup, deploy the workflow to make it active. Monitor the workflow to ensure it operates smoothly and make adjustments if needed based on real-world usage.
Documentation and Training: Document the workflow setup and its processes for future reference. Provide training or guidelines to users involved in creating estimates and approvals.