Table of Contents
ToggleHow to Organize and Manage Leads in NetSuite?
Examining the basic principles underlying sales leads. Understanding the components of a lead and the steps involved in generating one within NetSuite. This in-depth manual, presented by SuitePedia, the knowledge centre catering to NetSuite users, encompasses vital details necessary for generating leads within the NetSuite platform. Uncover the fields to complete, crucial data components, and strategies for managing leads. Navigate effectively through lead records, empowering users to streamline their sales pipeline and enhance client conversion strategies.
What defines a lead?
A sales lead denotes an individual or a business with the potential to evolve into a customer. Additionally, the term encompasses the information that identifies an entity as a possible buyer of a product or service.
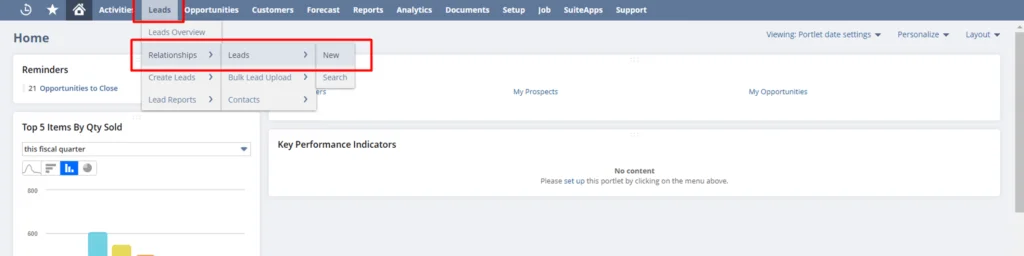
How to create a Lead in NetSuite?
To create a lead in NetSuite, go to Leads>> Relationships>> Leads>> New.
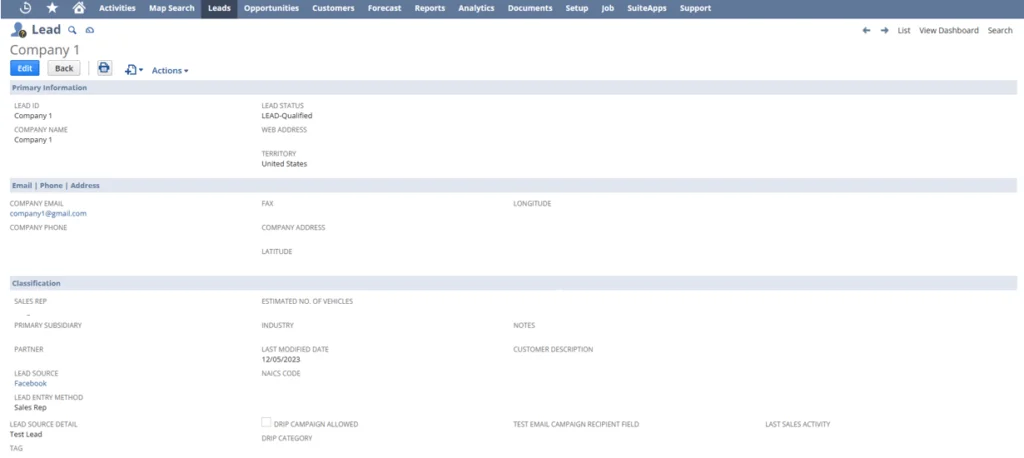
Information needs to generate a Lead in NetSuite
Users can add all the relevant information related to the lead in the NetSuite Lead Form. Below is the list of some basic ones:
- Company Name – The name of the company of the lead
- Lead Status – If the sales rep is just creating the lead record to start following up later or if the lead is less responsive to the sales rep’s communication, then it can be marked as LEAD-Unqualified. If the sales rep is actively in contact with the lead, it can be marked as Lead-Qualified.
- Web Address – The lead’s company website
- Company Email – The email address of the company of the lead contact
- Company Phone – The Phone number of the company of the lead contact or the company headquarters
- Estimated Vehicle – Any available number of vehicles with the Lead’s company
- Lead Source – The source of the Lead
- Lead Source Details – The Details of the Lead Source if any
- Lead Entry Method – It will be the entry type of the Lead. For Sales Rep, it will be ‘Sales Rep’
- Partner – The user can link the Partner to the Lead
- Industry – The industry of the Lead Company
- NAICS Code – The NAICS code of the Lead Company
- Relationship Subtab – Enter the Contact details of the Lead. Users can also assign the role to the Contact from the Role dropdown
- Qualification Subtab – Here, the user can mention the estimated budget of the company, the buying reason and time frame, etc.
- Address Subtab – Users can add multiple addresses of the company and can also mention which address is the default billing and default shipping address
- Sales Team Subtab – This subtab will automatically fetch the name of the logged-in User as the sales rep of the field with 100% contribution and Primary tag.
- Last Sales Activity – Once a lead is created, this field will show the recent activity linked to the lead along with its date. It will only update when the activity is updated by the sales rep of the lead.
- Communication Subtab – Once the lead is created, the user can email the company, add an activity, add files, add user notes, and can view the Bulk Merge mails sent to the company.
Where can User find their Leads records?
To view the Leads list, go to Leads>> Relationships>> Leads. Make sure to select ‘My Leads’ in the view dropdown.