
What is the Process of Netsuite's Vendor Record Creation?
In the world of business, vendors are the lifeblood of the supply chain, providing the goods and services that enable companies to function and thrive. Vendors, also commonly referred to as suppliers, play a pivotal role in the daily operations and success of countless businesses across various industries.
Vendors encompass a diverse range of entities, from individual artisans to multinational corporations, each specializing in providing specific products or services. They are the source of raw materials, components, finished products, and an array of professional services that businesses rely on to deliver their own products or services to the market.
In summary, vendors are indispensable partners that businesses rely on to acquire the resources and services needed to operate effectively. Successful vendor management is key to ensuring the efficiency, cost-effectiveness, and overall success of an organization. Vendors are essential contributors to the global marketplace, supporting the intricate web of interconnected businesses that drive economic growth and innovation.
Creation of Vendor
Creating vendor records in NetSuite is a foundational step in managing your procurement and vendor relationships. These records enable you to track and manage interactions, monitor accounts payable, and ensure compliance with financial and regulatory requirements.
Creating vendor records in NetSuite is a foundational step in managing your procurement and vendor relationships. These records enable you to track and manage interactions, monitor accounts payable, and ensure compliance with financial and regulatory requirements.

Creating a vendor in NetSuite involves several steps to set up and maintain essential information about the vendor. Here’s a basic outline of how to create a vendor record in NetSuite:
Log in to NetSuite: Log in to your NetSuite account using your credentials and access rights.
Navigate to Vendor Records: Once logged in, navigate to the Vendor Records section. This is typically found in the “Lists” or “Records” menu, depending on your NetSuite configuration.
Create a New Vendor Record: In the Vendor Records section, click on the “New” button or a similar option to start creating a new vendor record.
Fill in Vendor Information: You’ll be presented with a vendor information form. Fill in the required and relevant details.
Vendor Record Customization (Optional): Depending on your business needs, you can customize the vendor record with additional fields or tabs specific to your organization. NetSuite allows for extensive customization to track vendor-specific information.
Attach Files (Optional): You can attach relevant documents, such as contracts, invoices, or agreements, to the vendor record for easy reference.
Set Up Approval Workflows (Optional): If your organization has approval workflows in place for vendor creation or management, configure them as needed.
- Vendor Information needed for Vendor creation: The following information about the vendor should be necessary to create a vendor:
1. Vendor Company Name
2. Vendor Phone Number
3. Vendor Web Address
4. Vendor Company Address
5. Vendor Category
6. Vendor Primary Subsidiary
Apart from the above, the user can add any other vendor information like a W9 file, Certificate Insurance file, or Agreement File. User can also mention whether the vendor provides Installer Indoor Facility, comes under the Workers Comp program, the NAICS code, Install Coverage
Note
The Subsidiary cannot be changed once a transaction has been posted to a vendor.
Vendor Contact:
Contacts represent people or companies that we deal with in the daily activity of your business. We can use the contact record to create, modify, or delete contacts and associate a contact to a parent record (e.g., Vendors). Buyers can add Contact Person details under the Relationships sub-tab of the Vendor form. The following information about the contact can be added for the vendor:
1. Contact Name
2. Job Title
3. Email
4. Phone Number
5. Role
Note
If a contact’s role has been set as a Primary Contact, then only that contact will receive emails whenever a PO is sent to the vendor.
Only one primary contact can be defined per vendor, but there is no limit to the number of alternate contacts, consultants, or decision-makers.
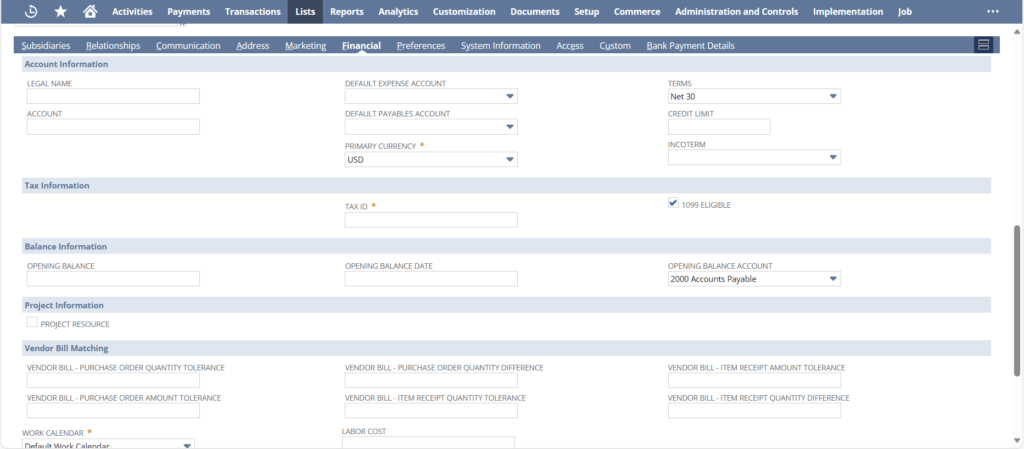
Financials:
In the Financial subtab on the Vendor creation page, the user can add below financial details:
1. Default Expense Account
2. Default Payables Account
3. Credit Limit
4. Terms
5. Tax Information
You can also read: How To Set Approval Matrices For Purchase Orders In NetSuite
Note
Always refer to the official NetSuite documentation for detailed and specific guidance based on your NetSuite version. Additionally, you may want to involve your NetSuite administrator or seek assistance from NetSuite support for any specific challenges you encounter during the setup process.